
Test 7
Retraction
A ring of small pillars. Every time the nozzle jumps from one pillar to the next it retracts, and each gap of the ring gets a different retraction length, written on the label under it. Look at the ring one gap at a time and pick the shortest length with no strings: that is your retraction length.
About 4 g of filament and about 16 minutes, with no changes to your profiles. One extra step: the G-code goes through a page of this site before you print it.
More
PrusaSlicer has one retraction length for the whole print, so the 3MF can't set a different one per gap. It only adds a comment to the G-code; the retraction rewriter reads it, finds the pillars and changes the retractions between them. That works on every firmware, Prusa, Klipper, Marlin and RepRapFirmware, with no firmware retraction and no printer settings to change.
What you need
To print
- The test file for your extruder: direct drive or bowden
- PrusaSlicer 2.9 (2.7 is the minimum that opens the project)
- Your own printer, print and filament profiles, already working, with a 0.4 mm nozzle and a retraction length above 0
- The temperature and pressure advance already set
- The filament to test, dry: about 4 g
- A bed at least 110 mm wide
To read it
- A lamp
- Something dark to put inside the ring: a card, a phone face down
Before printing
Step 1 What it is for, and when to run it
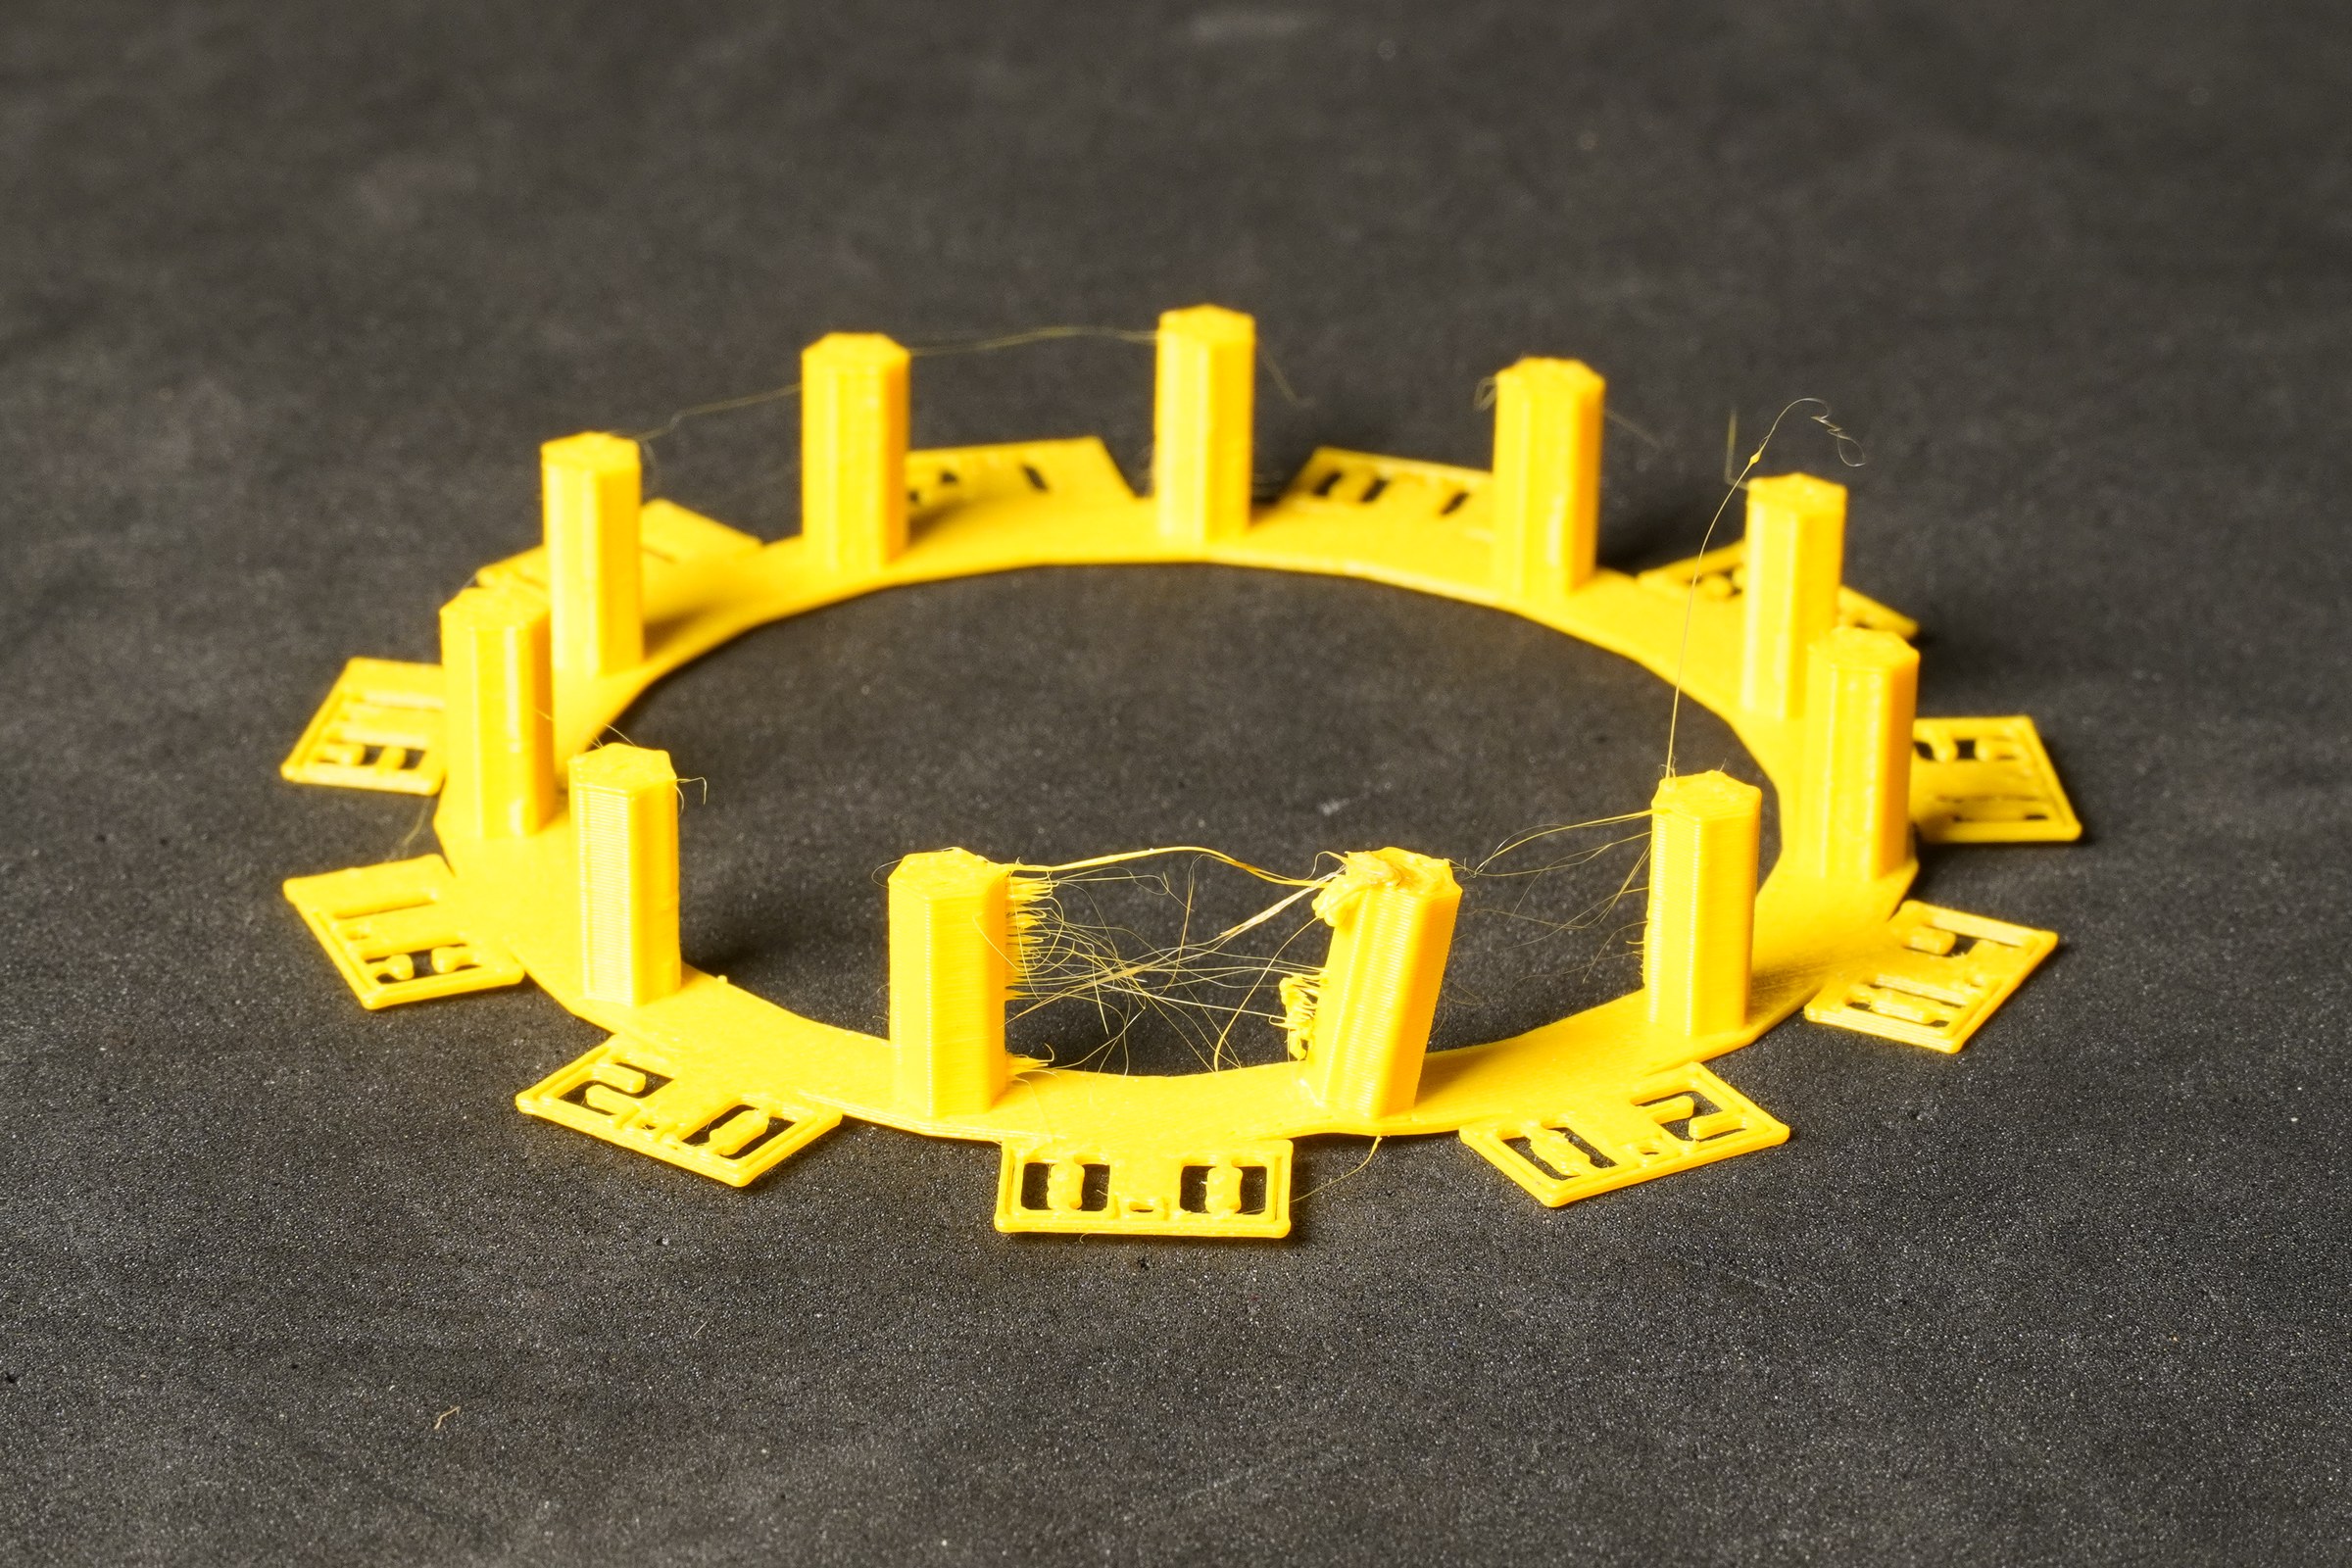
- Retraction pulls the filament back a little before each travel, so the nozzle doesn't ooze while it moves. Too little leaves strings and blobs; too much costs time and, on a direct-drive extruder, can pull molten plastic up where it jams.
- This test finds the shortest length that stops the strings for one filament. Run it after the temperature and pressure advance: a nozzle that is too hot strings at any length, and pressure advance changes how much plastic is left in the nozzle when it stops.
More
- Wet filament strings at any retraction length, and so does a nozzle that is too hot. If every gap has strings, dry the filament and check the temperature before you change the retraction.
- BeginnerIf your prints have no strings today, there is no need to run it: the test is for filaments that string, or for a new extruder or hotend.
Step 2 Which file
| File | Extruder | Gaps: retraction length |
|---|---|---|
retraction_dd_ | direct drive | 11 gaps, 0 to 2.0 mm in steps of 0.2 |
retraction_bowden_ | bowden | 13 gaps, 0 to 6.0 mm in steps of 0.5 |
- Pick the file for your extruder. The gaps go counter-clockwise from the front, and the last gap closes the ring: 2.0 (or 6.0) sits next to 0.
More
- The direct-drive ring is 95 mm across, the bowden ring 107 mm, both 12.6 mm tall. Each gap is about 15 mm wide.
- The pillars are hollow, with two walls and a closed top, so all of the time goes into the travels you are testing.
- ExpertOn an IDEX or multi-tool printer, assign the object to the tool you calibrate (right-click › Change extruder).
Step 3 Before you start
- Nothing to change in your profiles. Only check that your retraction length is above 0 (Printer Settings › Extruder 1 › Retraction › Length, or the Filament Overrides one): the page changes the retractions PrusaSlicer writes, and can't add them if there are none.
- Clean the nozzle before printing. Plastic stuck on the nozzle drops on the pillars as blobs that have nothing to do with retraction.
More
- Firmware retraction must be off (Printer Settings › General › Firmware › Use firmware retraction): with it on, the G-code has no lengths to change. The page tells you if it is on.
- Arc fitting must be off (Print Settings › Advanced). It is off by default.
- The layer height is forced to 0.2 mm. Wipe, z-hop, the retraction speed and the extra length on restart stay as your profile has them; the page keeps them and changes only the length.
Print and read
Step 4 Open, slice, rewrite and print
- File › Open project, then Slice now, then Export G-code. Binary G-code (
.bgcode) is fine. - Open the retraction rewriter and drop the file on it. It shows a table with every gap and the number of travels it rewrote, and a button to download the file to print.
- Print the downloaded file, not the one PrusaSlicer exported. Its name ends in
_retraction-0-2.gcode(or-0-6).
More
- Nothing is uploaded: the page reads and rewrites the file in your browser.
- The PrusaSlicer preview of the original file shows your own retraction everywhere: the change is only in the downloaded file. Its first ring layer has a line
;HEXCALIBR rewrittenthat says how many retractions it changed. - If you print the original file by mistake, nothing bad happens: every gap gets your own retraction, and the test shows nothing.
- On the author's printer the ring took 16 minutes, plus the start routine.
Step 5 Read the gaps
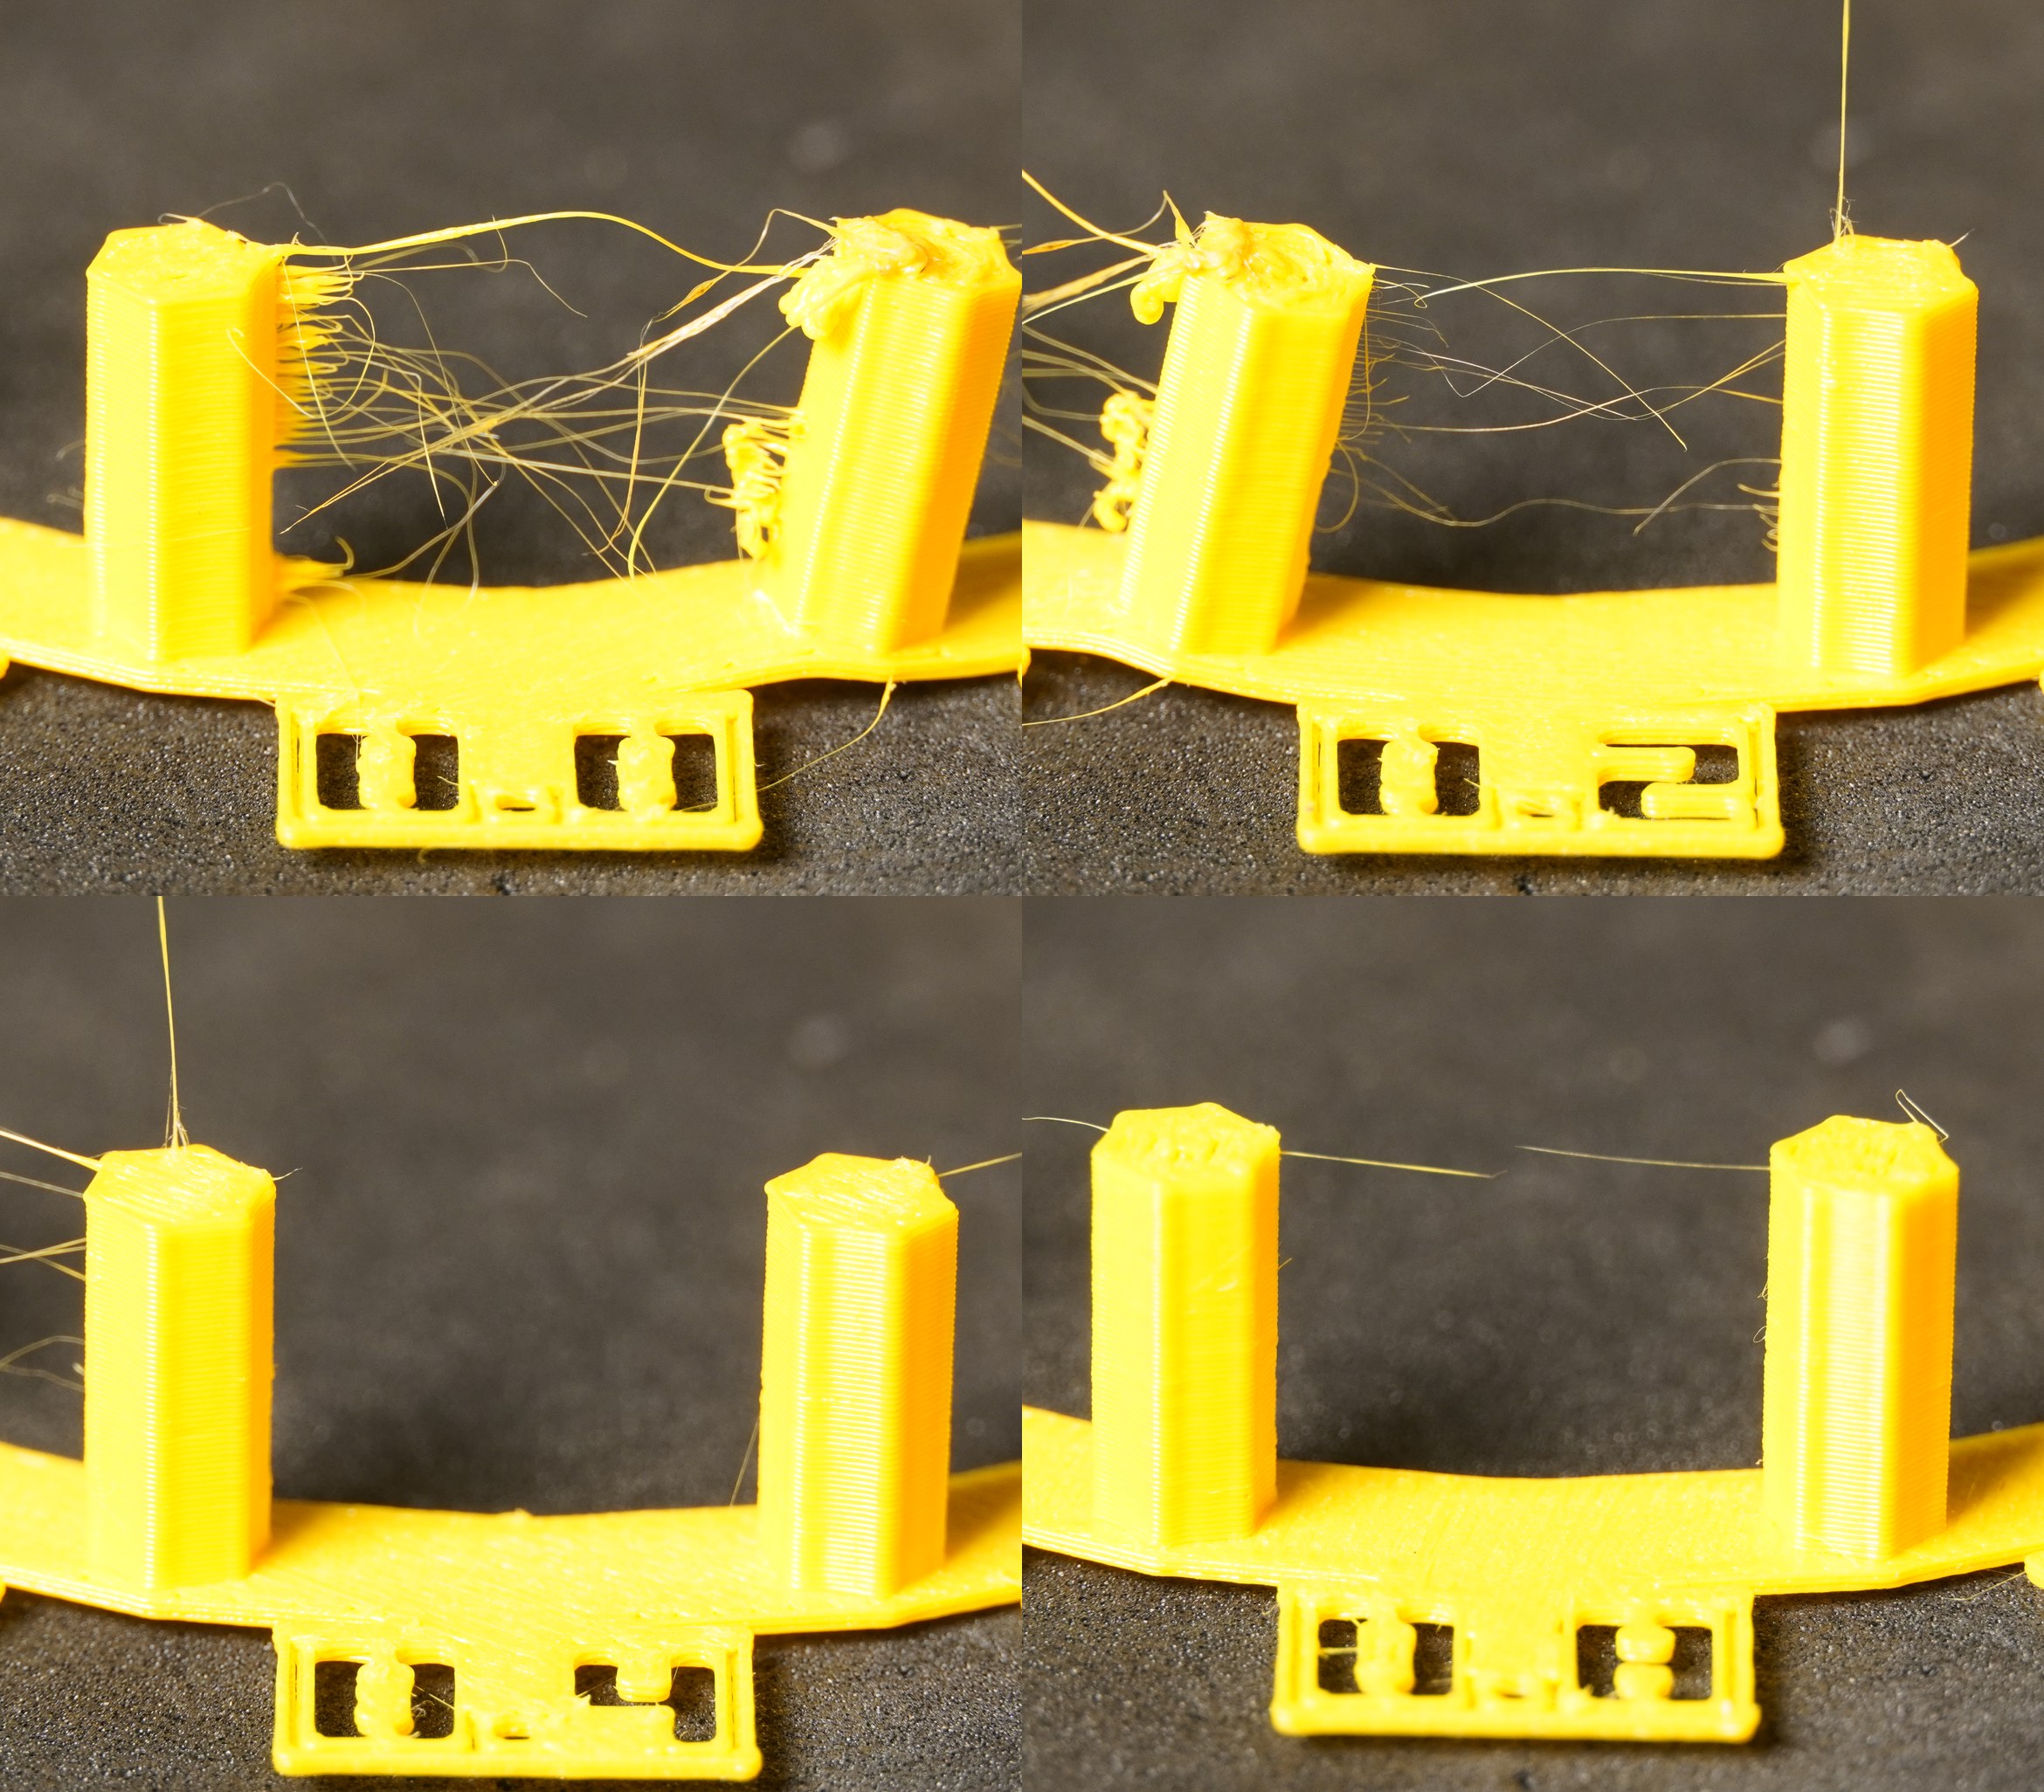
- Put something dark inside the ring, light it from the side, and look at one gap at a time from outside, at the height of the pillars.
- Too short: strings across the gap, at many heights, and blobs on the sides of the two pillars that face the gap.
- Right: the sides facing the gap are as clean as the others, and the gap is empty. At most one very fine hair.
- Start from 0 and go round the ring: your length is the first gap that is clean. If the next one or two look just as clean, keep the first: a longer retraction only costs time.
More
- Common misreadingOne fine hair at the top, running over several gaps at the same height: it shows at every length, so it is not the retraction. Judge the sides of the pillars and the middle of the gap.
- Common misreadingStrings in the gap next to 0: the pillar between 0 and the next gap collects the ooze of the 0 gap, and its hairs hang into its other side too. Judge the next gap by its other pillar.
- Common misreadingA blob on one pillar only, on the top or on a side that doesn't face a gap: plastic dropped from the nozzle. Clean the nozzle and judge the neighbours.
- On a direct-drive extruder the change usually happens in the first few gaps. If even the longest gap strings, check the filament (dry it) and the temperature first; then print the bowden file, which goes further.
Step 6 Save the value
- The best place is the filament: Filament Settings › Filament Overrides › Retraction › Length, tick it and type your length, then save the filament preset. Retraction depends on the filament, so each one keeps its own.
- Or, for every filament on that printer: Printer Settings › Extruder 1 › Retraction › Length, then save the printer preset.
More
- If you change the nozzle, the hotend or the extruder, run it again.
- The length you found is valid with your retraction speed and wipe settings: change those, and check it again.