
Test 5
Flow (extrusion multiplier)
Seven hexagonal pads in a row, each one step taller than the one before. The top of every pad is printed with a slightly different amount of plastic, from 91 % to 109 %. Look at the tops with a low light, pick the smoothest one with no gaps and no ridges, then print the fine file for that pad: seven more pads, 1 % apart. The best one gives your new extrusion multiplier.
About 8 g of filament and about 30 minutes per print, with no changes to your profiles.
More
PrusaSlicer has no flow setting per object, so the file sends a flow factor (M221) at the layer where each pad's top begins: the four top layers of pad 1 print at 91 %, those of pad 2 at 94 %, and so on. The pads below and above share those layers, but only their hidden insides. The file also fixes the speed of the pads at 60 mm/s, so every top is printed the same way, and puts everything back to 100 % at the end.
Open the file with File › Open project. Never with Import, never as a ZIP: an import keeps the shape but drops the flow factors, and every pad would print the same.
What you need
To print
- The coarse file, then one fine file
- PrusaSlicer 2.9 (2.7 is the minimum that opens the project)
- Your own printer, print and filament profiles, already working
- The first layer, the temperature and the pressure advance already set
- The filament to test, dry: about 8 g per print
- A bed at least 180 mm wide
To read it
- A lamp you can move, or a phone torch
- A fingernail
- The selector on this page
Before printing
Step 1 What it is for, and when to run it
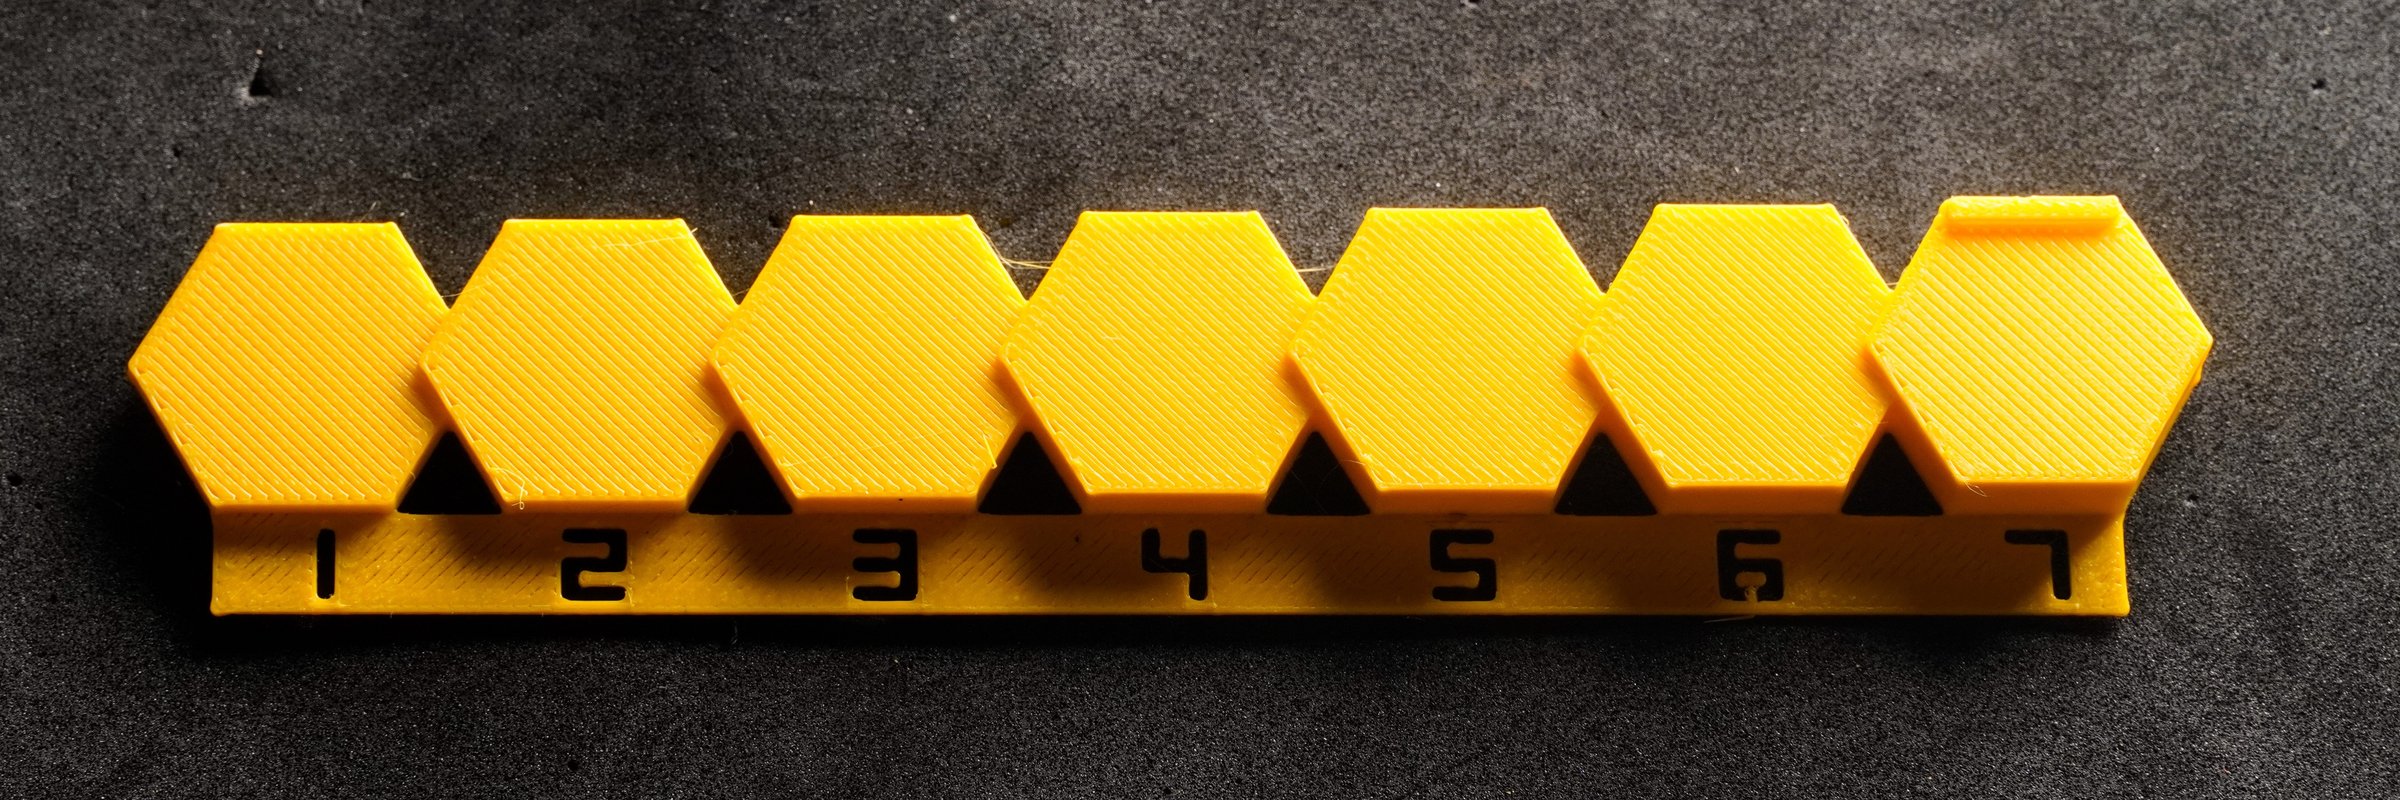
- It finds the extrusion multiplier of a filament: how much plastic PrusaSlicer asks for, so that solid layers are full without being overfilled.
- Run it after pressure advance, once per filament (and per nozzle). The result goes into Filament Settings › Filament › Extrusion multiplier.
More
- Too little plastic leaves gaps between the top lines and weak walls; too much makes ridges, rough tops, blobs and parts that come out slightly too big.
- Read it on top surfaces, not by measuring a wall with a caliper: a wall wobbles a little, so it always measures too thick, and 0.02 mm already means 5 %. That is why this test reads tops, as Ellis' guide recommends.
- It comes after pressure advance: PA changes how the line starts and ends, which shows on the tops.
- BeginnerThe multiplier is a correction on top of the filament diameter. Most filaments land between 0.92 and 1.05.
Step 2 Which file
| File | Pads | When |
|---|---|---|
flow_coarse_ | 91, 94, 97, 100, 103, 106, 109 % | First: finds the zone |
flow_fine_<from>-<to>.3mf | 7 pads, 1 % apart, centred on one coarse pad | Second: the one for your best coarse pad (the selector names it) |
- There are seven fine files, one for each coarse pad:
88-94,91-97,94-100,97-103,100-106,103-109,106-112. Print only the one the selector gives you.
More
- The fine file covers ±3 % around the coarse pad you chose. The coarse step is 3 %, so the right value is always within that range.
- Every file is 150 × 30 mm and about 8 mm tall: it fits any bed from 180 mm.
- ExpertOn an IDEX or multi-tool printer, assign the object to the tool you calibrate (right-click › Change extruder). The multiplier belongs to the filament profile of that tool.
Step 3 Before you start
- Write down the extrusion multiplier in your filament profile (Filament Settings › Filament). You need it at the end.
- Nothing else to change: layer height, speed and flow are set by the file for the pads only.
More
- The layer height is forced to 0.2 mm (half the nozzle): the file must know where each pad's top begins.
- The pads print at 60 mm/s, every line, as Ellis' guide recommends for this test. The slicer sees a slow print and never slows the small top pads down; a speed factor (
M220) brings them to 60 mm/s. - The narrow raised strip at the back of pad 7 is not a pad: its last layers put the flow and the speed back to 100 % and show the end message.
- If you cancel the print, send
M221 S100andM220 S100from the console before the next print.
Print and read
Step 4 Open, slice and print
- File › Open project, then Slice now. In the preview the pads rise one step each, from 1 on the left to 7 on the right.
- Print the coarse file. Do not touch speed or flow while it prints.
Step 5 Read the tops
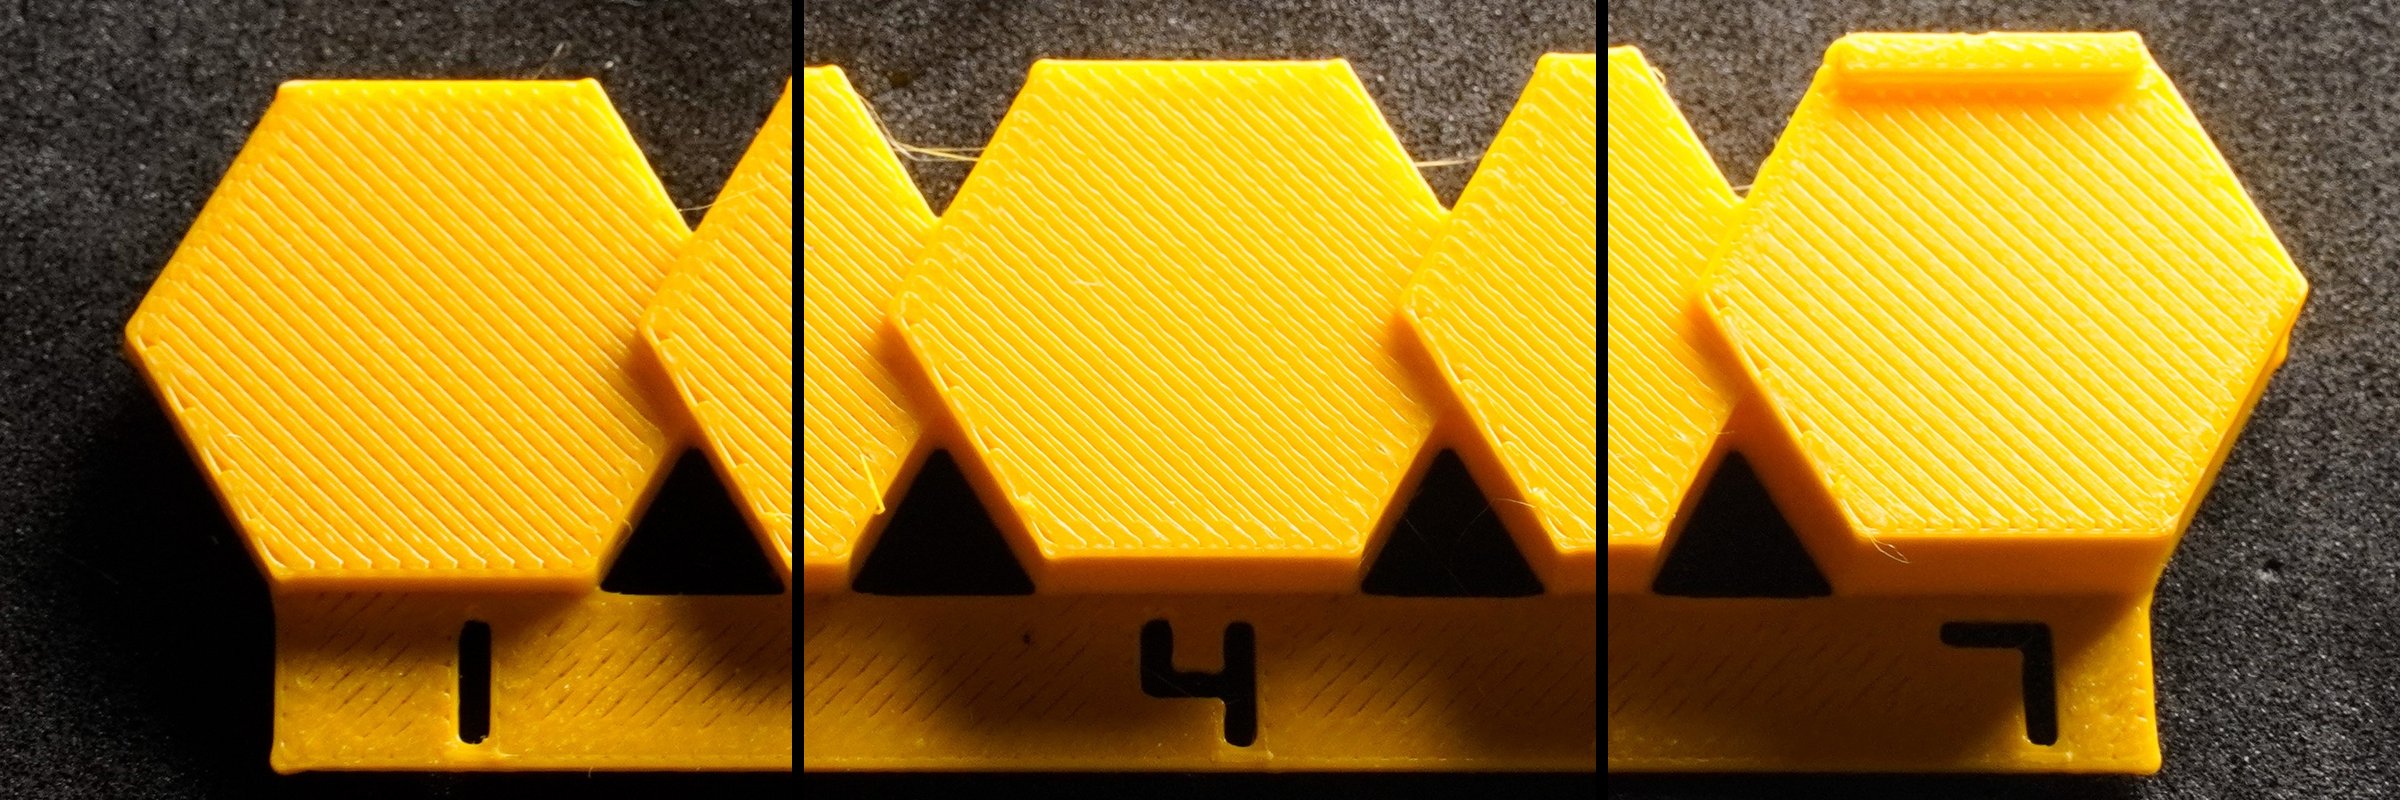
- Hold a light low, raking across the top lines, and look at the middle of each pad.
- Too little: gaps or dark grooves between the lines; you may see the infill through them.
- Right: lines joined with no gaps, a flat, even top; the lines are still faintly visible, and you can still feel them with a fingernail.
- Too much: ridges (lines standing higher than their neighbours), a rough top that catches your fingernail, plastic piled up at the edges.
- If two pads look alike, run a fingernail across the lines of both: keep the one where it glides evenly, without dropping into grooves or catching on a raised line.
- If they still feel equally good, take the higher one: a little too much is better than a little too little.
More
- Common misreadingThe edges always look fuller: the perimeters and the turnarounds of the top lines add plastic there. Judge the middle.
- Common misreadingA glossy, perfectly smooth top can be too much: look for the faint lines, and for ridges under a fingernail.
- Common misreadingYou can feel lines on every pad, even the best one: that is the shape of each printed line, not a flow error. The multiplier only makes the lines even; for a truly smooth top, turn on ironing (Print Settings › Infill › Ironing, expert mode) on the parts that need it.
- Common misreadingGaps only on one side of each line, or rough patches that move from pad to pad: wet filament or a worn nozzle, not the multiplier.
- Pad 1 is the lowest and pad 7 the highest, but every top is the same: four layers over sparse infill, with the lines running the same way on every pad. The height does not change the reading.
Step 6 Choose the fine file, then the new value
- Tick the best pad of the coarse print: the selector names the fine file to print.
- Print it, read it the same way, tick its best pad and type the extrusion multiplier your profile has now: the selector gives the new value.
More
- New multiplier = the multiplier now × the best pad's percent ÷ 100. Example: 0.98 now, best pad 96 % → 0.98 × 0.96 = 0.94.
Step 7 Save the value
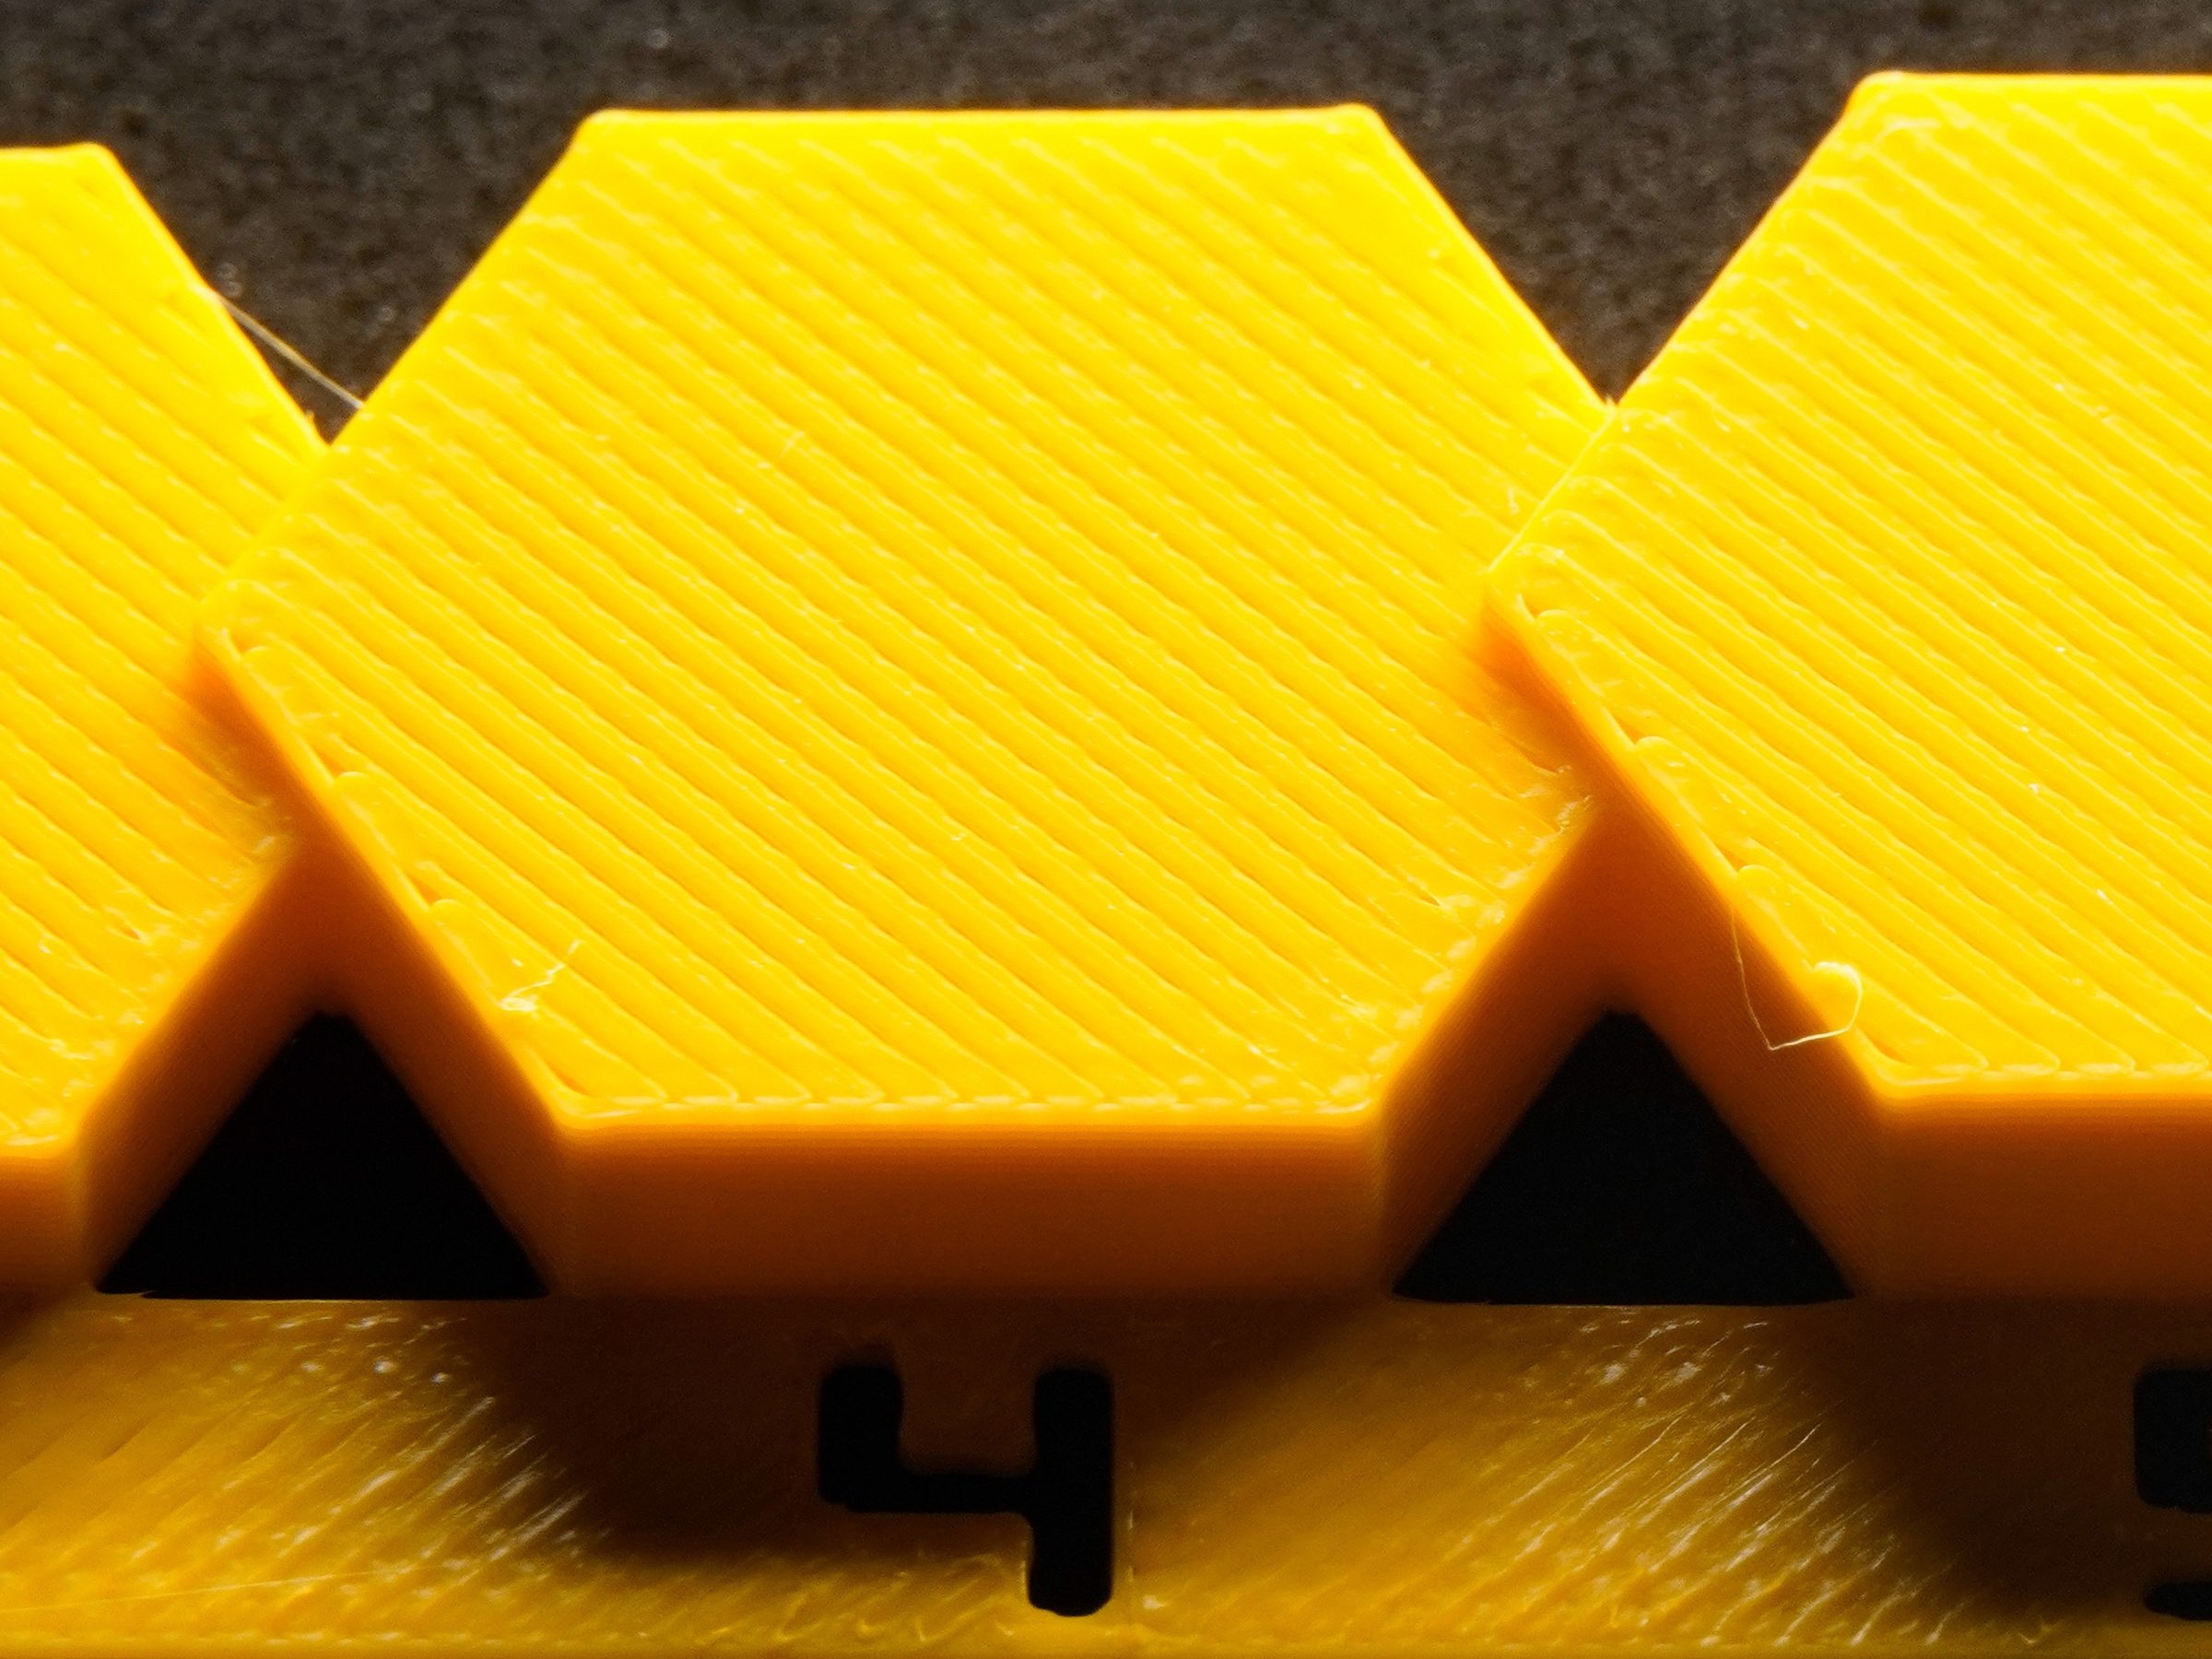
flow_fine_97-103 after saving the new value (PETG, 0.85 → 0.88): pad 4 (100 %) is the best one. Lines joined, no grooves, none standing up; you still see and feel them.- Type the new value into Filament Settings › Filament › Extrusion multiplier and save the filament preset (the disk icon).
- Print the fine file
flow_fine_97-103once more if you want to check it: pad 4 (100 %) should now look best.
More
- The value belongs to this filament on this nozzle. A new spool of the same filament usually keeps it; a different brand or colour can differ by a few percent.
- If you later change the nozzle or the hotend, run it again.