
Test 6
Ironing (flow and speed)
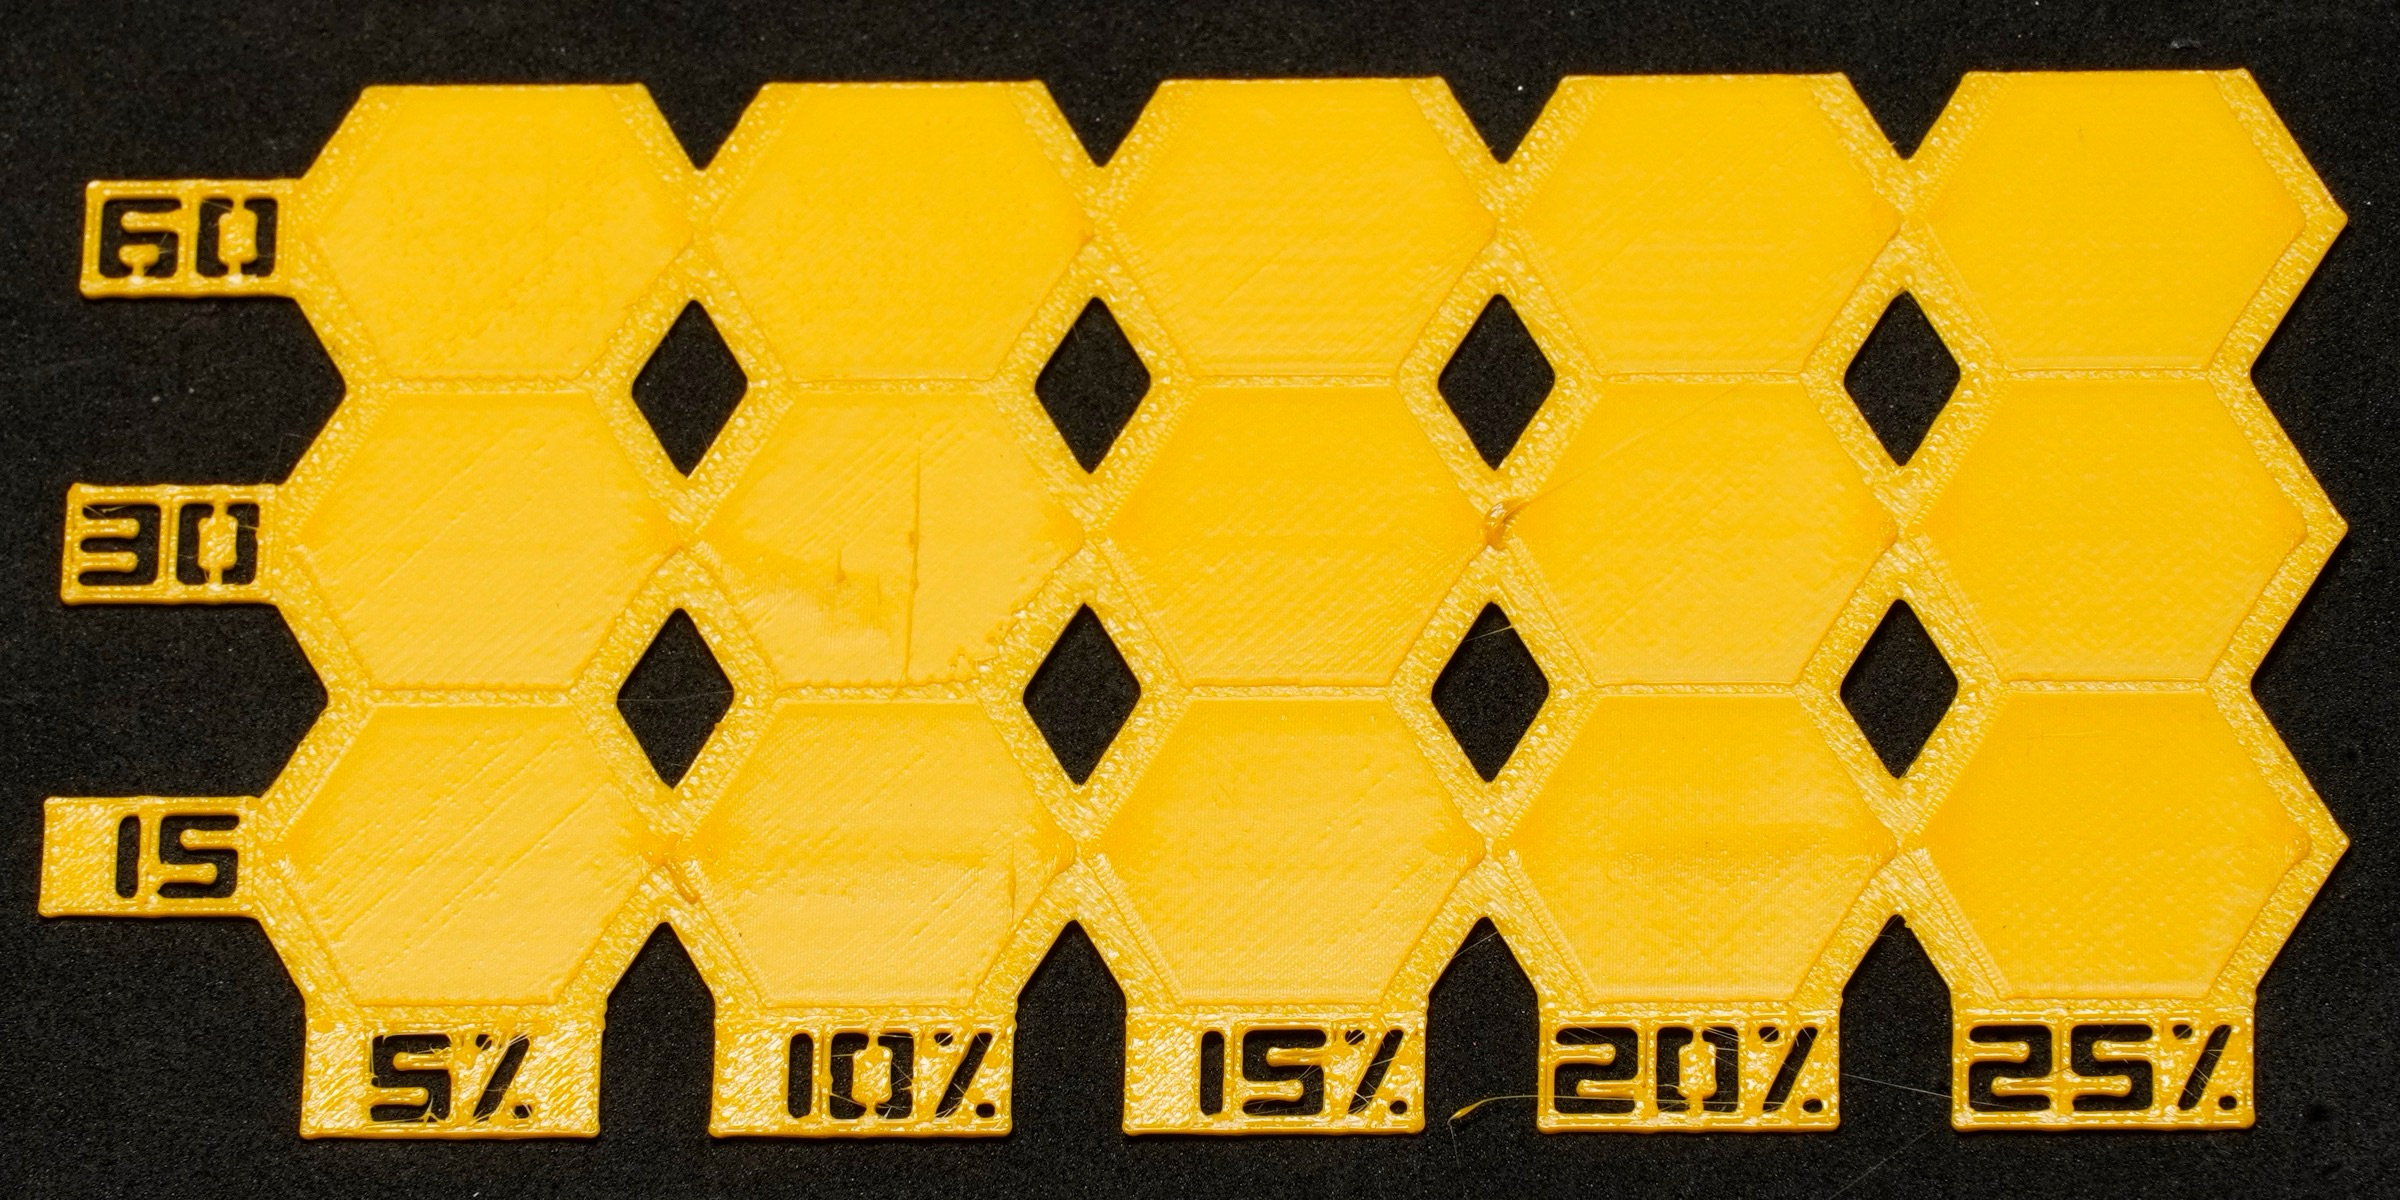
Fifteen hexagons on one thin plate. The top of each one is ironed with a different amount of plastic (5 % to 25 %, the columns) and at a different speed (15, 30 and 60 mm/s, the rows). Look at the tops under a low light, run a fingernail over them, and pick the smoothest: its column and row labels are your ironing flow and speed.
About 5 g of filament and about 47 minutes, with no changes to your profiles.
More
Each hexagon has its own modifier in PrusaSlicer, which sets the ironing flow and speed for that hexagon only. There is no custom G-code and no firmware command: the file works on any printer that PrusaSlicer can slice for. The labels and the plate around the hexagons are not ironed.
What you need
To print
- The test file
- PrusaSlicer 2.9 (2.7 is the minimum that opens the project)
- Your own printer, print and filament profiles, already working, with a 0.4 mm nozzle
- The temperature and the flow already set
- The filament to test, dry: about 5 g
- A bed at least 180 mm wide
To read it
- A lamp you can move, or a phone torch
- A fingernail
Before printing
Step 1 What it is for, and when to run it
- Ironing is a last pass of the hot nozzle over a top surface, with a trickle of plastic, to flatten the lines into a smooth, even top.
- This test finds the ironing flow and the ironing speed that work for a filament. Run it after flow, once per filament, if you use ironing.
More
- Too little plastic leaves the top lines visible, in stripes. Too much makes the top rough and bumpy: the extra plastic gathers in small scales and ridges.
- Flow and speed work together. The flow is plastic per millimetre of path, so the speed does not change how much plastic goes down; it changes how long the hot nozzle stays on each spot. That is why the test is a grid and not a single row.
- BeginnerIroning makes tops look moulded, but it is slow: turn it on only for the parts that need a smooth top.
Step 2 Which file
| File | Columns: flow | Rows: speed |
|---|---|---|
ironing_ | 5, 10, 15, 20, 25 % | 15, 30, 60 mm/s |
- There is only one file: the 5 % steps are close enough to choose a value.
More
- The PrusaSlicer default, 15 % at 15 mm/s, is in the grid: the 15 % column, front row.
- The plate is 133 × 69 mm and three layers thick (about 0.6 mm): it fits any bed from 180 mm.
- The file sets the spacing between ironing passes to 0.1 mm, the PrusaSlicer default. A closer spacing adds plastic exactly like a higher flow, so changing both would blur the reading.
- ExpertOn an IDEX or multi-tool printer, assign the object to the tool you calibrate (right-click › Change extruder).
Step 3 Before you start
- Nothing to change in your profiles: the file turns ironing on for the hexagons only and sets their flow and speed.
- Clean the nozzle before printing. Plastic stuck on the nozzle can drop onto a hexagon as a blob.
More
- The layer height is forced to 0.2 mm, with one perimeter, so that the plate is three solid layers and most of it is top surface.
- The first-layer height comes from your profile: anything from 0.15 to 0.32 mm gives the same three layers.
Print and read
Step 4 Open, slice and print
- File › Open project, then Slice now. In the object list each hexagon has a modifier named after its flow and speed, for example
ironing 15% 30 mm/s. - Print it. Leave the speed factor at 100 % while it prints: it changes the ironing speed too, and the rows would no longer match their labels.
More
- The ironing is done on the last layer, hexagon by hexagon, and takes most of the print time.
- To check the file, look at the preview with the Speed legend: the three rows show different colours (15 and 30 mm/s can be close shades if your profile prints fast). The Volumetric flow rate legend shows them all in the lowest colour: ironing uses so little plastic that the scale, made for the other lines, cannot tell them apart.
Step 5 Read the tops
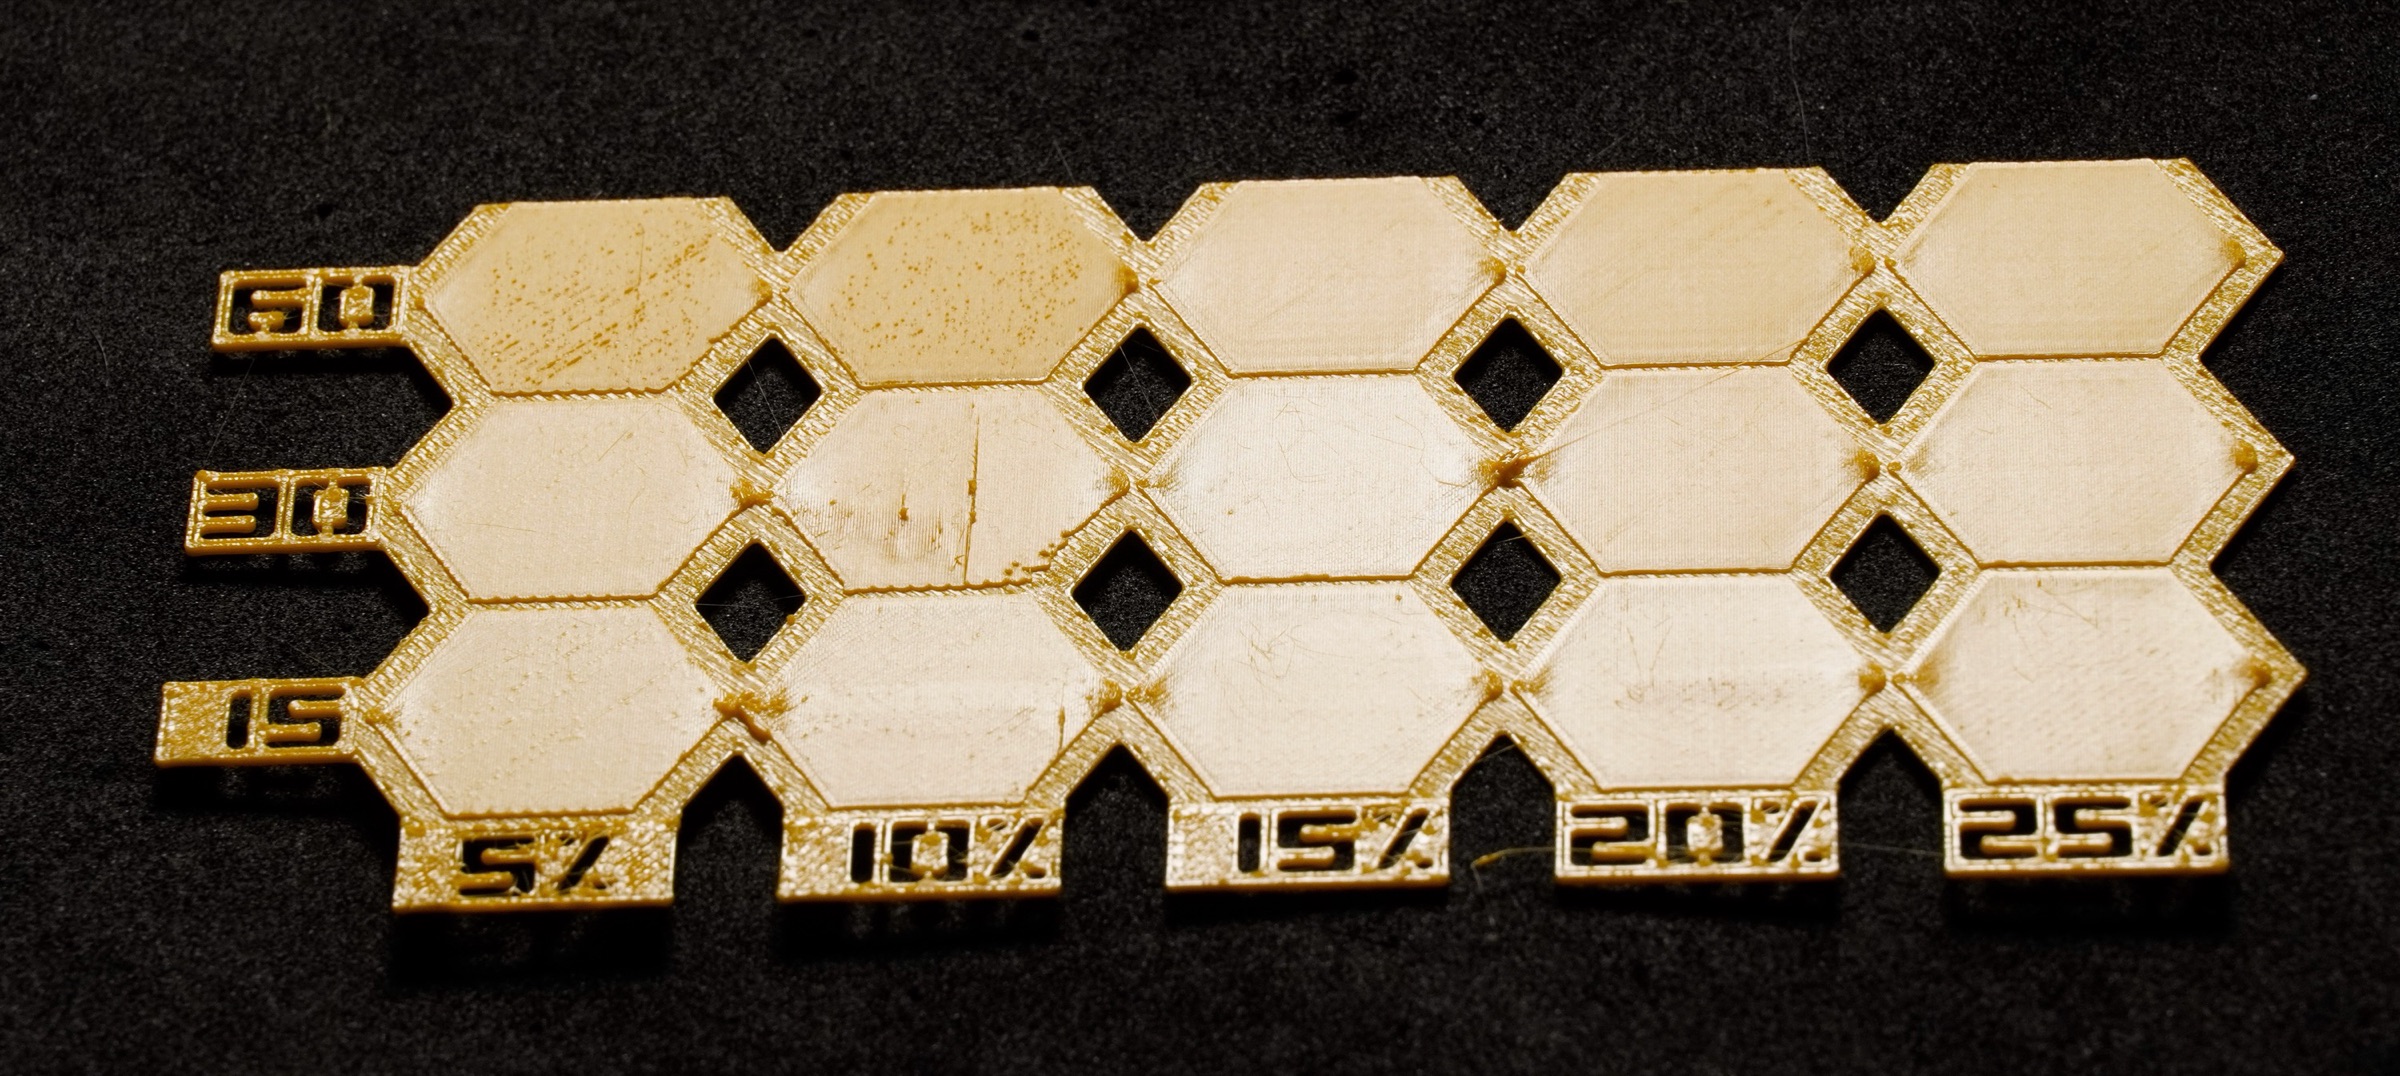
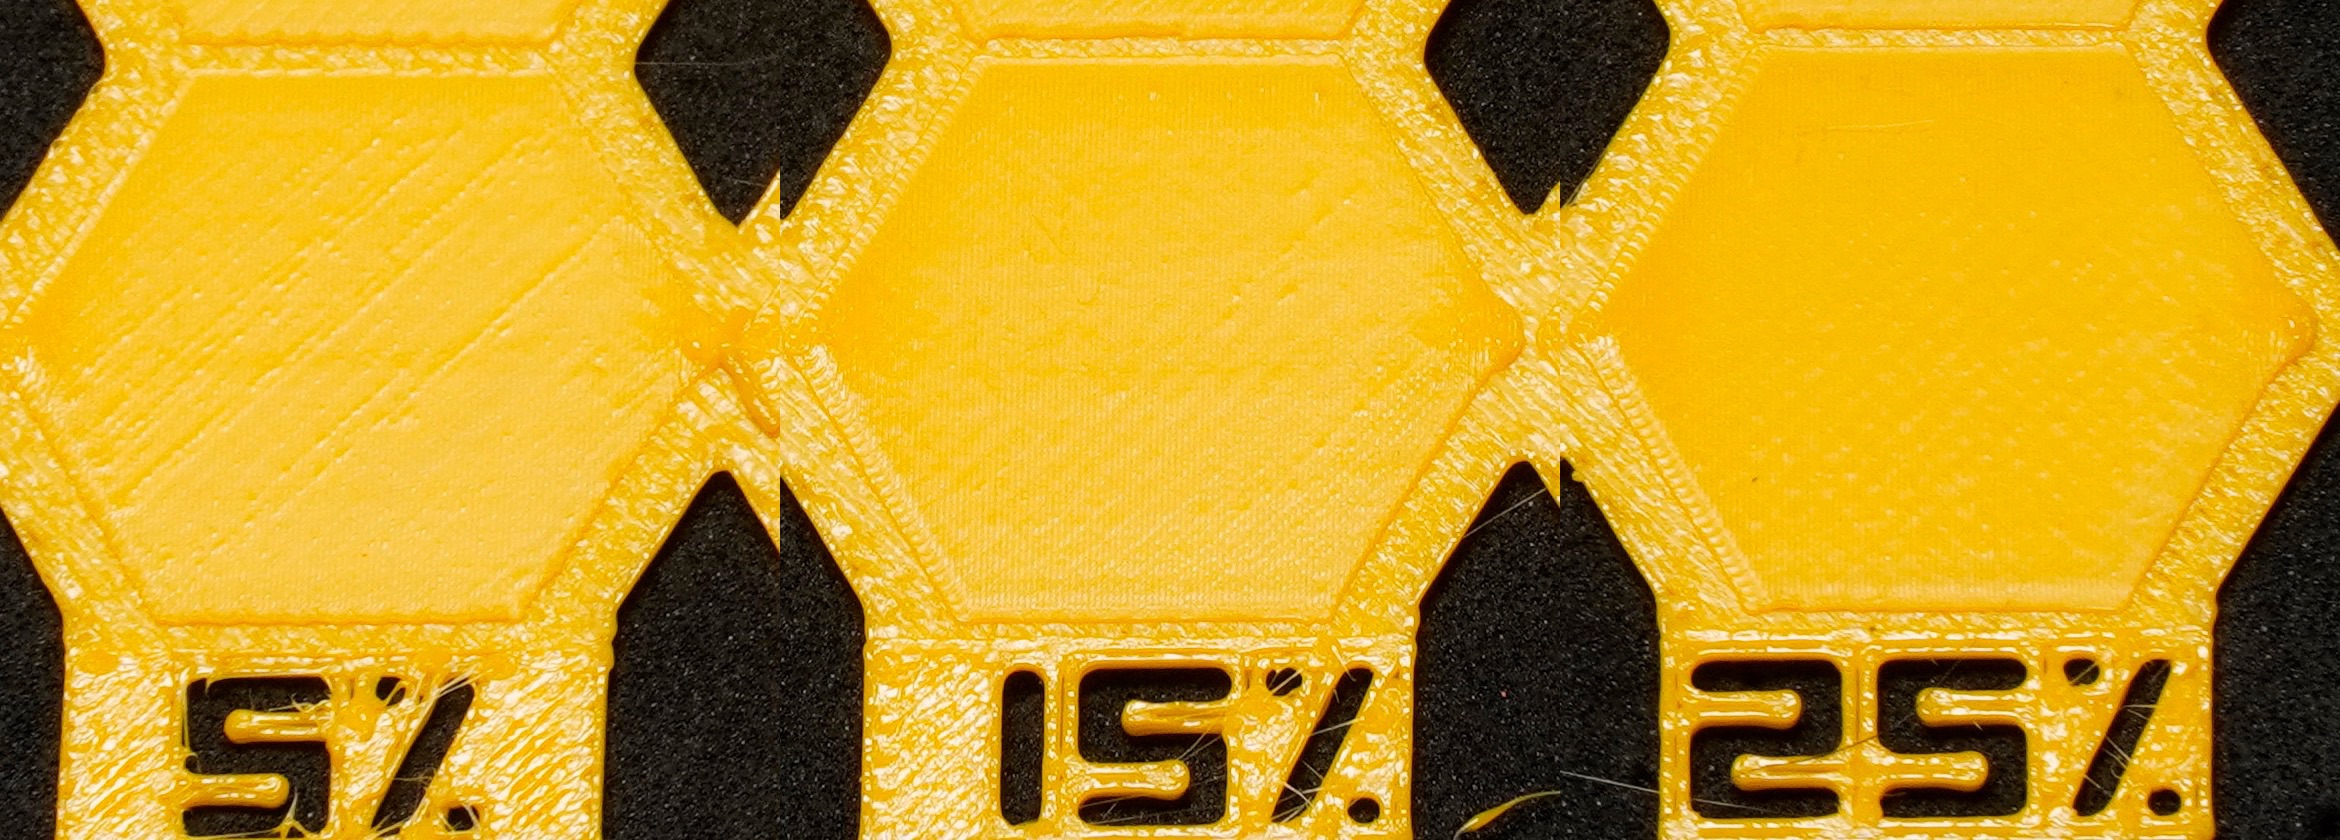
- Hold a light low and look at the middle of each hexagon, then tilt the plate until the light reflects off the tops.
- Too little: the lines of the top layer still show, in stripes; the top looks streaky.
- Right: an even top with no stripes and no bumps; at most a very fine texture. A fingernail glides over it.
- Too much: small bumps or scales all over the top, ridges you feel with a fingernail.
- Run a fingernail over the best ones and keep the smoothest. If two speeds feel the same, take the faster one: ironing is slow, and the fastest row that still looks right saves time on every print.
More
- Common misreadingMarks at the corners of a hexagon: that is where the nozzle starts and ends each hexagon. Judge the middle.
- Common misreadingA blob or a scratch on one hexagon only: plastic that built up on the nozzle and dropped onto it or dragged across it, not a flow problem. Clean the nozzle and judge its neighbours.
- Common misreadingFine scratches that show only under raking light come from handling. Read the overall texture, not the scratches.
- In the author's PETG print the best flow was the same as the PrusaSlicer default (15 %), but at twice the speed: 30 mm/s irons in half the time.
Step 6 Save the values
- Ironing is a print setting, in expert mode. Set Print Settings › Infill › Ironing: tick Enable ironing, choose the Ironing Type (usually All top surfaces) and type the Flow rate of your best hexagon.
- Check that Spacing between ironing passes, on the same page, is 0.1 mm: the flow you found is valid at that spacing.
- Type its speed in Print Settings › Speed › Ironing, then save the print preset (the disk icon).
More
- The values belong to the filament, but ironing is a print setting: keep one print preset per material, or turn ironing on for single objects (right-click › Add settings › Ironing, and › Speed for the ironing speed).
- Ironing makes the print longer: use it on parts that need a smooth top, not on every print.
- If you change the nozzle or the flow of the filament, run it again.